34

Properties

All of the Transform functions, and more, can also be altered through the Properties menu. The benefit of using the Properties menu over the Transform tool is that you have greater precision due to being able to input specific numerical values.
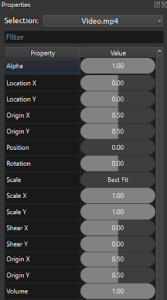
Properties Menu, OpenShot

To edit an asset’s appearance or behaviour, right click on it in the Timeline and select Properties. This will open the Properties menu, which contains all of that asset’s properties.
The way that you alter an asset’s properties is the same regardless of which property is being changed – by either clicking and dragging left/right to slide the value down/up, or typing in a numerical value.
Keyframes

It’s important to note that whenever the value of an asset is changed by using the Transform tool or Properties menu, a Keyframe is created wherever on the asset the Playhead is placed. This is indicated both by a green vertical line that appears on the asset in the Timeline, and by the text box turning green in the Properties menu.
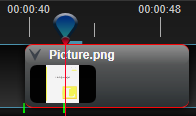
Keyframes are edited where the Playhead is on the timeline, OpenShot

Note: if the Playhead is not positioned over the asset, the Keyframe will by default be applied to the beginning of the asset

An edited property

Keyframes act as start and end points, between which a value is changed over time. This is how you can animate objects to move around the screen, visibly change their size/rotation/transparency, and more.

License

Icon for the Creative Commons Attribution-NonCommercial-ShareAlike 4.0 International License

Open Source for Digital Communication & Learning Objects Copyright © 2022 by David Kwasny & Matthew Humphries is licensed under a Creative Commons Attribution-NonCommercial-ShareAlike 4.0 International License, except where otherwise noted.

Share This Book