35
To make your video more engaging and dynamic, you can use Keyframes to animate your visuals. Though the following example will focus on using Keyframes to create movement (having an image slide in/out of frame), the same techniques can be applied to other properties of an asset as well.
To animate an image to slide on-screen:
1. Select the asset you want to animate, and position your Playhead at the beginning (using the orange Previous Key Point button makes this easier)
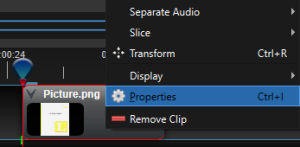
2. Right click on the asset > Properties
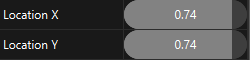
3. Adjust the X/Y location values so the asset is off-screen
Note: values shown are for demonstrative purposes. You may need to use different values for your asset
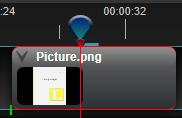
4. Reposition the Playhead at the point in time you would like the asset to be finished sliding into view
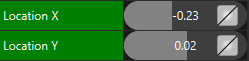
5. Adjust the X/Y location values so the asset is on-screen, at its final destination
Note: values shown are for demonstrative purposes. You may need to use different values for your asset
If done correctly, the asset will slide from its original X/Y location to the new X/Y location. The amount of the time it takes to transition from one set of coordinates to the other depends on the amount of time placed between each Keyframe (ie. how far apart the green lines are from each other).
This same principle of creating start and end points can be applied to many different property values such as volume, scale, alpha channel, and rotation. This is why understanding and experimenting with Keyframes is so critical to using OpenShot to its full potential.
