20
If there is extra audio that you need to record or add to audacity-intro.mp3. Recording new audio in Audacity is really simple.
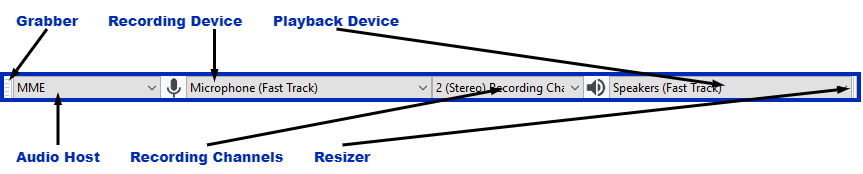
Before recording make sure you have selected your best audio recording microphone in the Device Toolbar’s Recording Device drop down menu.
You can check to see that your microphone is picking up audio by checking the Record Meter.
![]()
If you click on the microphone button, and select ‘Start Monitoring’ you will be able to see your microphone is picking up sound if it is working properly.
![]()
When your microphone is setup and working properly. You can begin recording. To record audio simply press the ‘R’ key on your keyboard or use the Record button on the Transport Toolbar
To stop the recording press the ‘P’ key on your keyboard to Pause the recording, or the ‘X’ key to Stop the recording. You can also use the Transport Toolbar to Pause or Stop the recording as well. If you paused your recording, you will need to Stop the recording to exit recording mode.
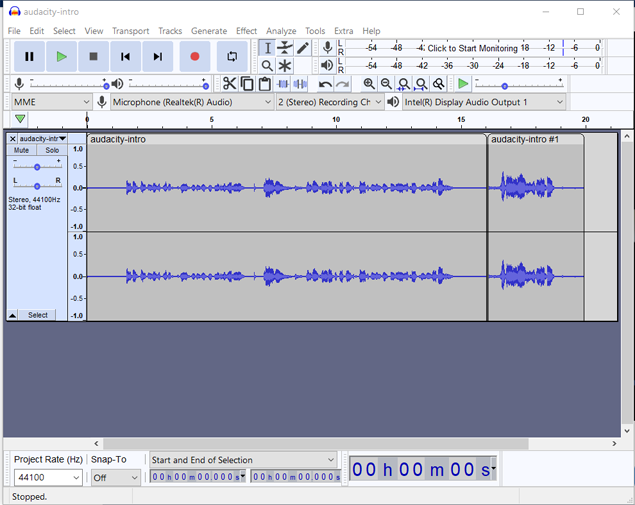
Add some audio to the end of the audacity-intro.mp3 track. If you tried this, you will notice it started the recording immediately following the end of the audacity-intro.mp3
If you would like to record on a new track, you can press ‘Shift +R’ on your keyboard and you will start recording on a new track from where ever the playhead is located on your timeline.
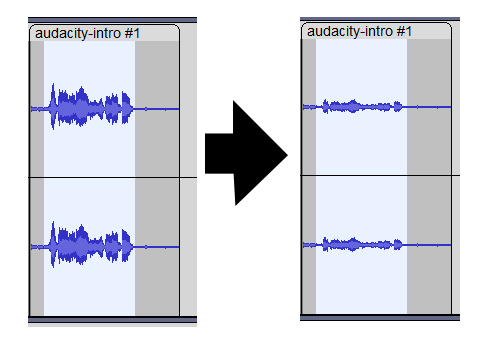
Noise Reduction
You can also remove background noise by using the ‘Noise Reduction’ effect. You can find the ‘Noise Reduction’ effect in the ‘Effects‘ menu. You will also notice there are a lot of effects you can use. Noise Reduction can reduce constant background sounds such as hum, whistle, whine, buzz, and “hiss”, such as tape hiss, or fan noise while you are recording. It is not suitable for individual clicks and pops, or irregular background noise such as from traffic or an audience.

After you have selected the ‘Noise Reduction’ effect. The Noise Reduction window will pop up. Click ‘Get Noise Profile’, this will help Audacity to know what sounds to filter out.
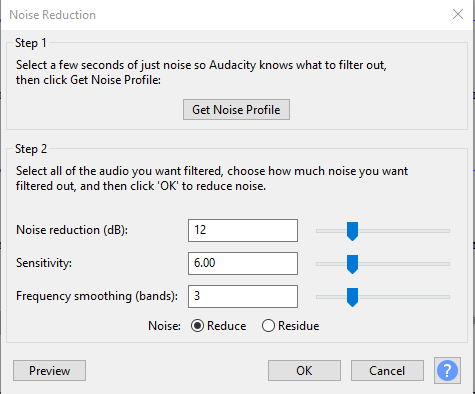
Click ‘OK’, select the audio clip you would like to adjust background noise on and access the Noise Reduction window one more time and just click the ‘OK’ button again. Audacity will use the noise profile it obtained previously to adjust the background noise.