Chapter 5: Blood Pressure
Blood pressure is measured in many ways including manual/auscultatory, automatic/electronic, cellular phone applications, and arterial catheters. Whatever method is used, blood pressure must be measured using validated equipment. It has been found that blood pressure is often not measured accurately in clinical practice, particularly when using the auscultatory/manual method. It is important to ensure correct technique to obtain an accurate measurement. Hypertension Canada (2020) recommends electronic blood pressure measurement as the preferred method in clinical practice.
Points to Consider
Take blood pressure in both arms when you measure a client’s blood pressure for the first time. A small difference in blood pressure between the arms is often normal. Differences of greater than 10 mm Hg systolic between the arms are investigated further because this finding has been associated with vascular disease and mortality outcomes. Measure subsequent blood pressures in the arm with the higher blood pressure.
Client Positioning
Blood pressure is generally taken in a sitting or supine position with the bare arm at heart level (OER #1). Certain health states prevent some clients from sitting, such as clients who are critically ill, unstable, or postoperative. Thus, healthcare providers document the client’s positioning (e.g., sitting, supine, standing). If sitting, the feet are placed flat on the floor with the back resting comfortably against a chair. The healthcare provider checks to ensure that the client’s legs are not crossed, because this can increase blood pressure. The client sits resting for five minutes before you take the blood pressure. This waiting period is not feasible when the client’s condition is deteriorating or a STAT blood pressure is required. Because the client should be resting, you should ask them not to talk or move. Additionally, you should not ask them to hold any of your equipment during the blood pressure measurement.
Cuff Types and Sizes
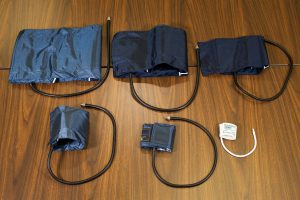
Manual and automatic blood pressure measurement involves using a blood pressure cuff with a sphygmomanometer. Many cuff sizes are available to fit newborns, children, adults, people with small and larger arms, and people with cone-shaped arms. The cuff is typically wrapped around the upper arm. However, there is also a cuff that can be placed on the thigh when the arm is not feasible. See Figure 5.1 of varying blood pressure cuff sizes. Wrist devices can be used for blood pressure estimation when clients have a large upper arm circumference (Nerenberg, 2018). When taking the measurement, make sure that the arm and wrist are supported at heart level (Nerenberg, 2018).

Figure 5.1: Varying blood pressure cuff sizes
It is important to choose a cuff size that matches the client’s arm size, rather than their age. See Table 5.2 about cuff sizing. See Film Clip 5.1 of a demonstration of accurate cuff sizing.
Table 5.2: Cuff Sizing
| Cuff Sizing |
|---|
| The width of the cuff is 40% of the person’s arm circumference |
| The length of the cuff’s bladder is 80–100% of the person’s arm circumference |
Film clip 5.1: Accurate cuff sizing
Alternatively, if viewing textbook as a pdf, use this link: https://www.youtube.com/embed/uNTMwoJTfFE?rel=0
Before placing the blood pressure cuff on the client’s arm, palpate the brachial artery using three fingers (not your thumb) just above the antecubital fossa medially (OER #1). To do this, palpate the bicep tendon at the antecubital fossa. Move 2 cm medially from the tendon and 2–3 cm above the antecubital fossa. Press firmly to feel the brachial pulse. Wrap the blood pressure cuff securely and evenly around the client’s upper, bare arm (not over clothing) with the cuff’s artery marker aligned with the brachial artery and about 3cm above the antecubital fossa.
Technique Tips
Thigh blood pressure is indicated when blood pressure cannot be taken on the arm, such as when clients have bilateral amputation or burns. Thigh blood pressure is also done on children and adolescents with unusually high blood pressure in the arm and to compare differences between upper and lower extremities. In such cases, coarctation of the aorta (a congenital narrowing of the aorta) is possible. The thigh systolic blood pressure is 10–40 mm Hg higher than the arm systolic blood pressure, while the thigh diastolic blood pressure is approximately the same as the arm. To obtain thigh blood pressure, the client must be in prone position. Place the cuff around the bottom third of the client’s thigh. The cuff’s artery line is aligned with the popliteal artery. The popliteal artery can be located in the popliteal fossa. Palpate the medial tendon and move the pads of your three fingers lateral to the tendon. Press your fingers into the femur or tibia bone. Continue with the same process as noted above in terms of taking blood pressure.
Blood Pressure Methods
Manual blood pressure measurement is taken using a blood pressure cuff with a sphygmomanometer and a stethoscope. See Figure 5.2. This technique is detailed on next page.

Figure 5.2: Blood pressure cuff with a sphygmomanometer and a stethoscope
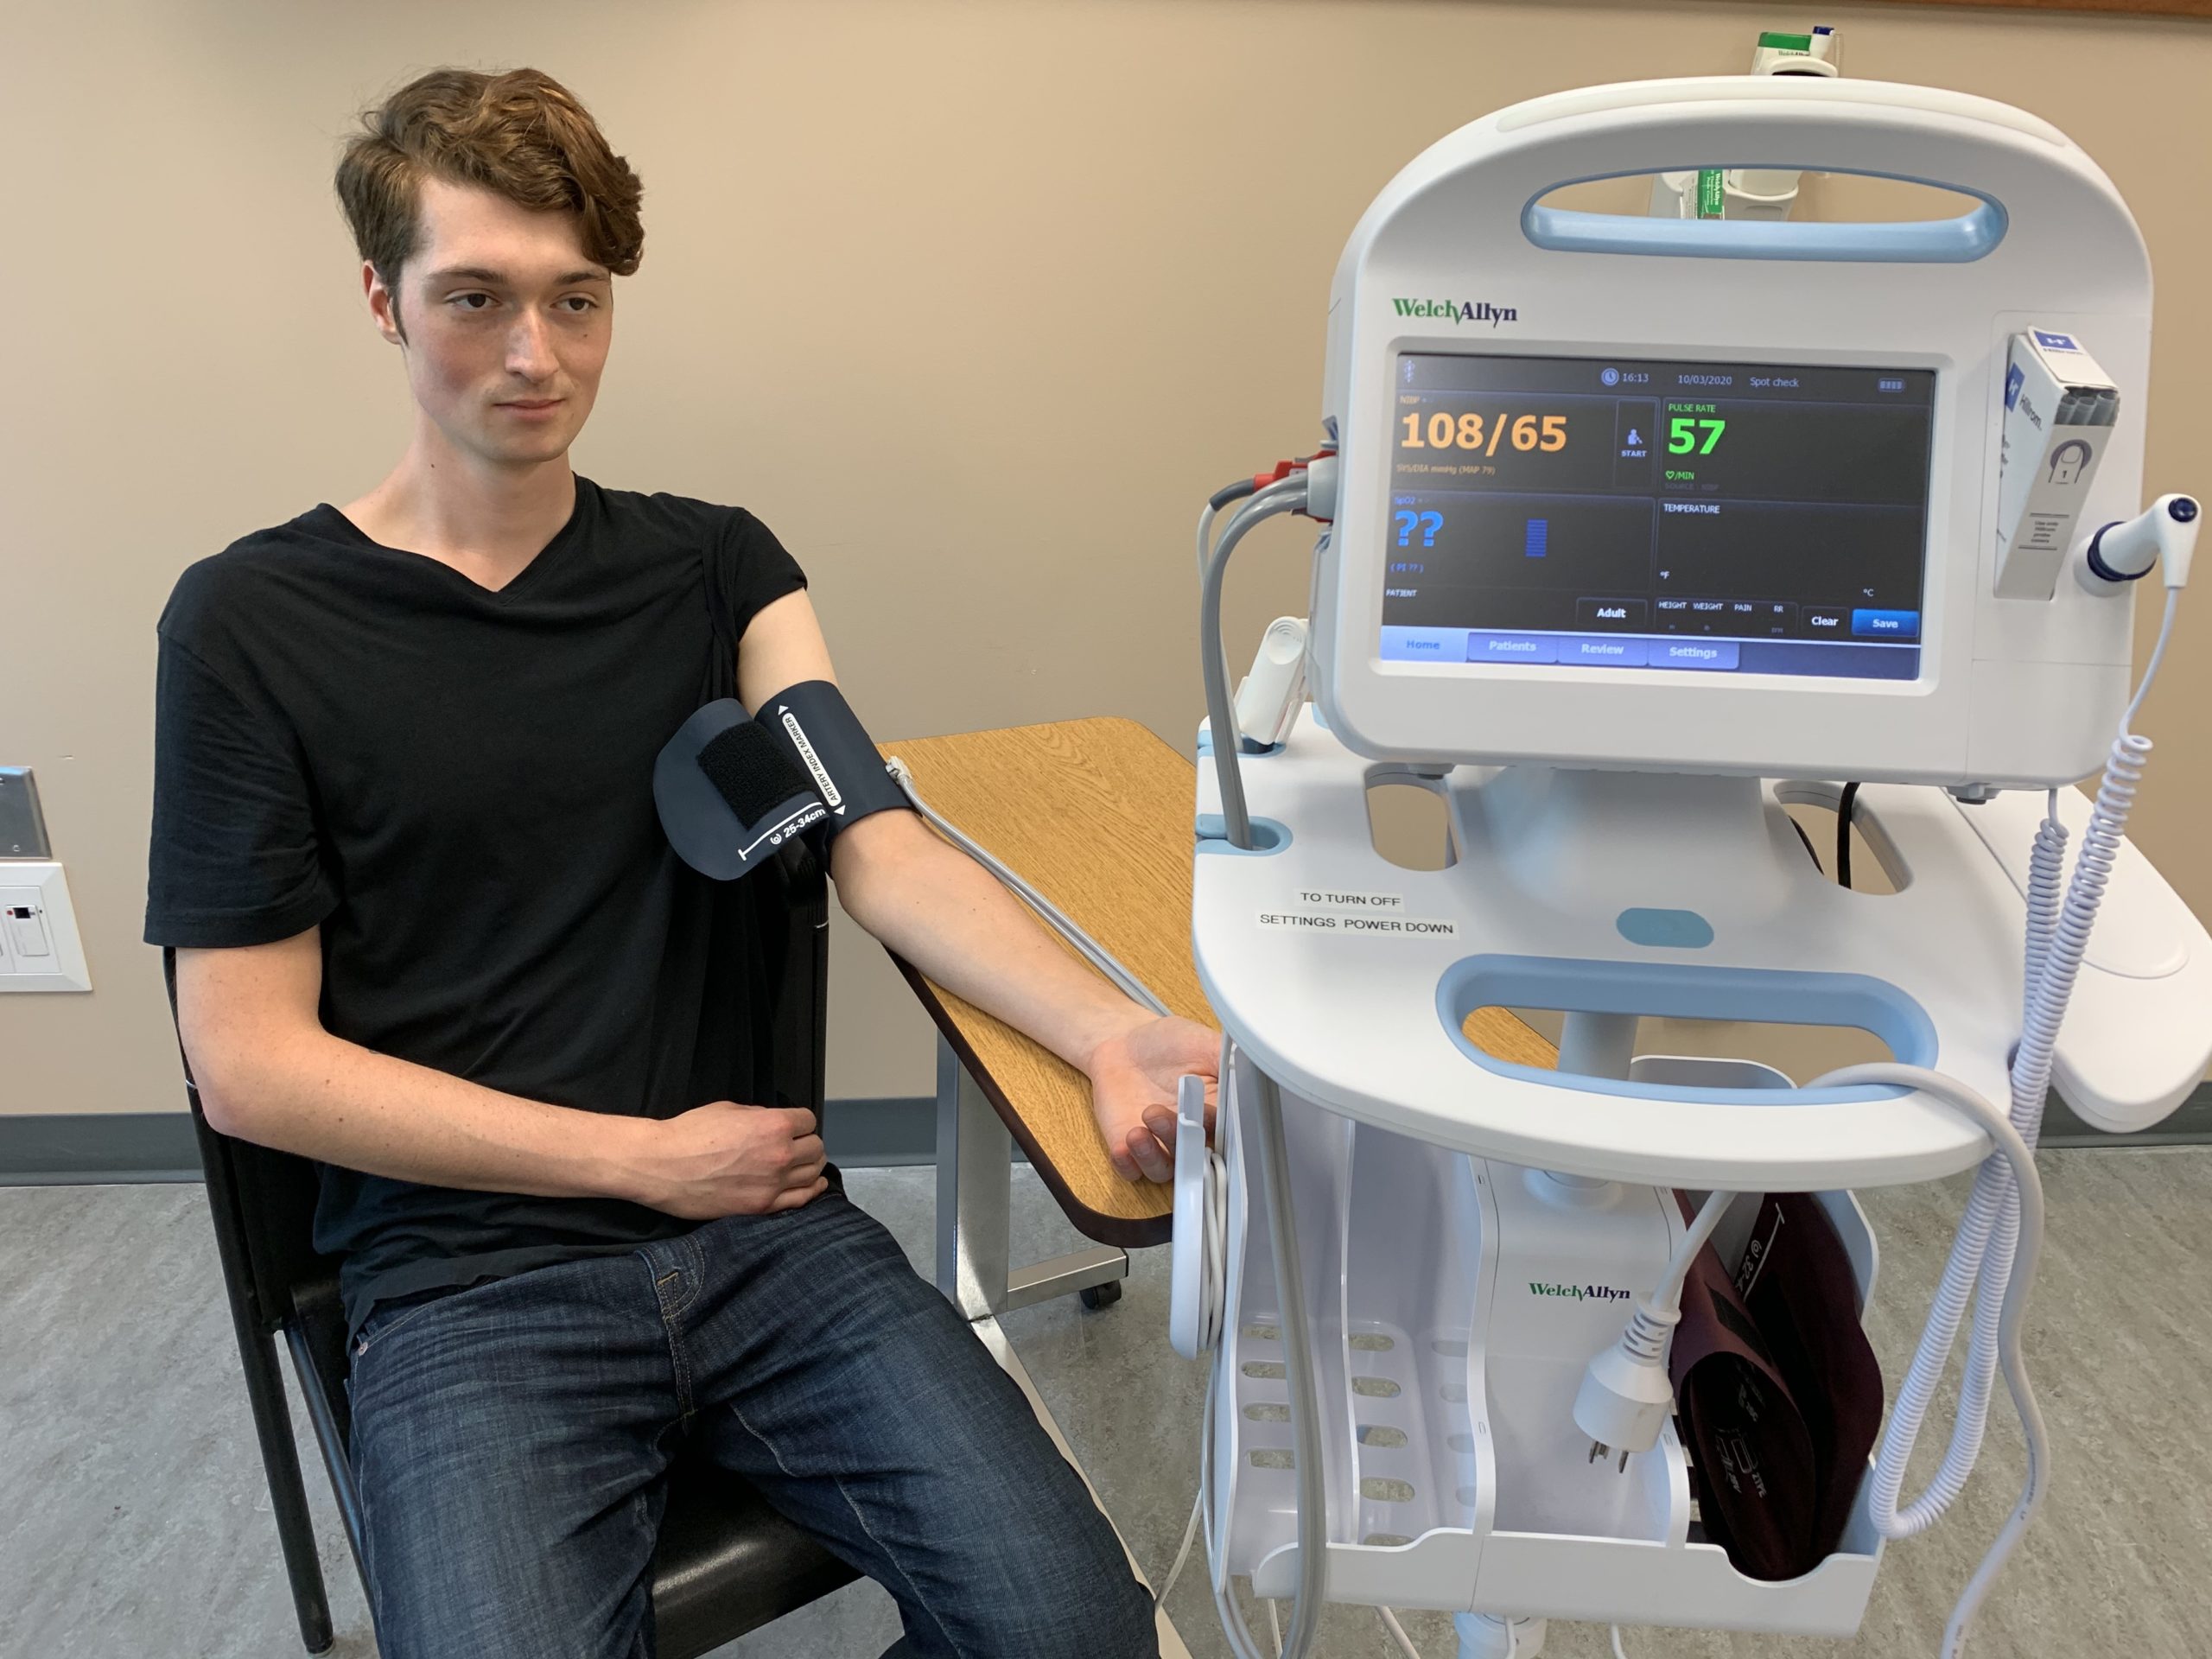
Automatic blood pressure cuffs are a digital way to measure blood pressure. See Figure 5.3. After positioning the client and the blood pressure cuff on the arm, press the start button on the monitor. The cuff is automatically inflated and then deflates at a rate of 2 mm Hg per second. The monitor has a digital display that shows the blood pressure reading when done. Automatic cuffs can be programmed to take a series of blood pressure readings in a row. If the healthcare provider is concerned about an initial high blood pressure reading on a client, the accuracy of the blood pressure is verified with the following actions:
- have the client sit in a room by themselves
- quiet the room
- dim the lights
- allow the client to sit quietly, without talking
- then take three measurements, a few minutes apart, with the automatic cuff. The blood pressure displayed is an average of the three readings.

Figure 5.3: Automatic blood pressure cuff
Clients can monitor their own blood pressure at home with an automatic digital blood pressure monitoring device. Clients are advised to use a device that meets the standards of the Association for the Advancement of Medical Instrumentation, the requirements of the British Hypertension Society protocol, or the International Protocol for Validation of Automated Blood Pressure Measuring Devices. The cuff is applied around the client’s upper arm or wrist. Similar to the automatic cuff noted above, the client presses the start button and the cuff inflates and deflates based on programmed levels displaying a digital reading. Clients are encouraged to document their blood pressure or use a device with data-recording capabilities to increase the reliability of their reported home blood pressure monitoring. These data can be shared with the client’s primary care provider.
Arterial catheters are an invasive way to measure blood pressure and are only used in critical care situations when continuous blood pressure monitoring and arterial blood gas draws are required. This involves insertion of a catheter (similar to an intravenous) into the artery. The catheter is connected to a pressure transducer and monitor that provide a digital blood pressure reading.
Cellular phone applications have been developed to measure blood pressure, but the accuracy of this technology is still being investigated.
Points to Consider
Avoid using an automatic blood pressure cuff if the systolic pressure is less than 90 mm Hg in an adult, the pulse is rapid or the rhythm is irregular, and/or the client is experiencing shivers or tremors. It is best to also complete a manual blood pressure measurement to validate the accuracy of the automatic blood pressure measurement.
_________________________________________________________________________
Part of this content was adapted from OER #1 (as noted in brackets above):
© 2015 British Columbia Institute of Technology (BCIT). Clinical Procedures for Safer Patient Care by Glynda Rees Doyle and Jodie Anita McCutcheon, British Columbia Institute of Technology. Licensed under a Creative Commons Attribution 4.0 International License, except where otherwise noted. Download this book for free at http://open.bccampus.ca

